
HOW TO MAKE SIMPLE INDOOR DIY HANGING PLANTERS YOUR FRIENDS WILL LOVE
These DIY handing planters are going to be a big hit. It’s always fun to make one-of-a-kind gifts for friends and family every holiday season. Sometimes, it’s hard to find the time to craft something completely from scratch. That’s why we love being able to repurpose thrifted goods into something that is useful and beautiful without it taking weeks to make. The hanging planters we’ll be putting together today, for example, take only a couple of hours to complete! At this rate, you’ll have everyone crossed off your list before the first candle of Hanukkah is lit!
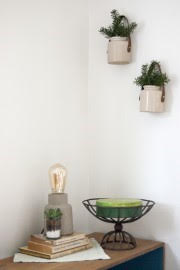
Making DIY Hanging Planters
Here’s what you’ll need to craft your own hanging planters:
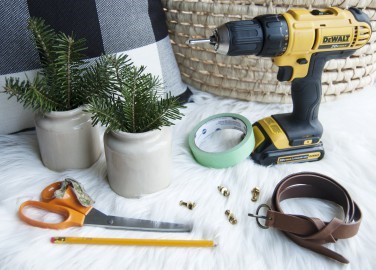
Supplies
– Thrifted ceramic jars (or adjust the project for tins or glassware)
– Thrifted belt
– Drill
– Ceramic tile drill bit
– Painter’s tape
– 4 screws that fit properly into the drilled hole
– 4 coordinating washers
– 4 coordinating nuts
– 1 nail
– Small hammer
– Scissors
– Pen or pencil
– Measuring tool (a sewing tape measure works perfectly)
– 2 plants
– Hooks/hardware to hang the planters (if the planters won’t be hung in a stud, make sure you include wall anchors)
– Safety mask
– Safety goggles
– Small piece of scrap wood
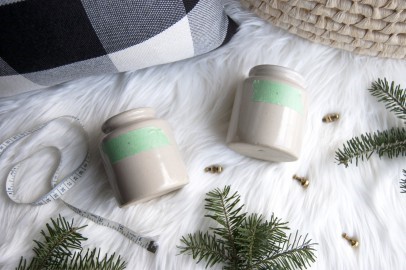
Step 1: After washing your thrifted ceramics, plan the placement of the holes. You’ll need two on each planter. Put a bit of painter’s tape over those areas and mark where you want the holes to be. The tape keeps the drill bit from skidding across the glaze as well as protecting the surface from small cracks the drilling could cause.
Step 2: Gently set a nail on each mark and tap it a tiny bit (so carefully) just to dent the glaze. This creates a starting point for the drill bit to bite into.

Step 3: You may want to take this one outside as there will be some dust. With your safety equipment on, carefully drill all four of your holes. If the dust is clogging up the hole, try sucking it out with a vacuum or wiping it with a damp cloth or Q-tip.

Step 4: Remove the tape and wipe the planters down. You may even want to rinse and dry them if there’s a lot of dust inside.

Step 5: Measure and cut the length you’ll need for your belt straps. These were each 13” long. After cutting them to size, round all four ends of the straps.
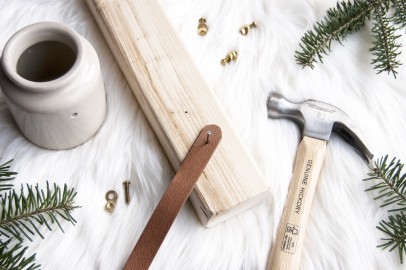
Step 6: Decide where the holes in your straps should be then mark all four of those. Place the straps, one end at a time, on the scrap wood and hammer the nail through to punch a hole. You may need to wiggle this around quite a bit to stretch it so the screw will fit through.

Step 7: Thread the screws through the straps and planters one at a time, securing them from the inside with the washer and then the nut. Tighten as best as you can. Then, all you need to do is add greenery!
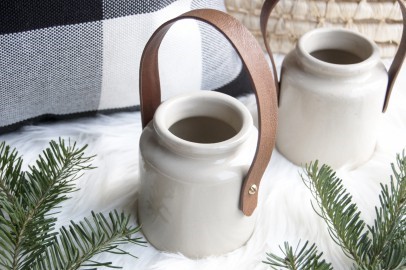
Dangling plants like burro’s tail or ivy would look amazing here, but to keep things festive we decided to start with clippings from a Christmas tree. This way, plants can be swapped out seasonally, by style preference, or to best suit the light wherever your pal decides to install her planters. You may want to include hanging hardware with your gift to make it even easier to put up.
If you wanted to, you could also include a note that shares the source of your supplies along with Goodwill’s mission: to generate opportunities for people to build brighter futures for themselves and their families. This way, the person who receives your gift knows that these are so much more than just planters. When you holiday shop at Goodwill stores, your gifts just keep on giving!
